What better way to bring in the new year than with surprise number one...
I am beside myself with joy that Jennifer at THE OLD PAINTED COTTAGE has selected my home as the JANUARY 2011 COTTAGE OF THE MONTH!
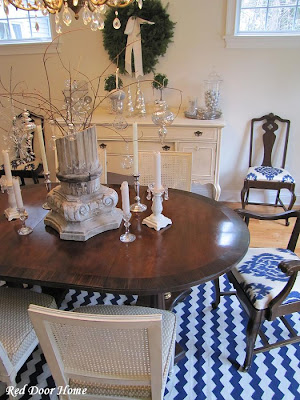
Here's a sneak peek at my home...
Please head on over to THE OLD PAINTED COTTAGE to see the full story and a look at my home.
Thanks Jennifer, it was fabulous working with you! All the best to everyone in 2011!
Hugs,
Shelley
Friday, December 31, 2010
Top Projects and Posts of 2010
Before diving into 2011, I thought it would be fun to take a look back on this past year. It definitely was a busy 365 days filled with numerous projects and house updates. The following are my favorites (in no particular order) from 2010.
Metal Top Table Redo
Using my favorite painting and glazing technique, I transformed a metal top coffee table a friend no longer wanted.
Daughter’s Room Redo
My daughter’s room went from little girl blue and green to big girl pink, tan and gray. Projects included dog silhouettes, embellishing a cork board, creating a marble top side table, and adding ceiling molding.
Dining Room
Paint changed a mismatched group of furnishings – a floor sample clock, thrift store chairs and buffet, and a Craig’s list table – into a cohesive grouping. With the addition of a zig zag rug, Ikat fabric to cover the chairs and a mirror (which has yet to arrive) this space started the year almost empty and finished almost full.
Bye Bye Red Room
We lightened up our red living room by painting it white, removing accessories and adding new curtains. This space is still a work in progress and is on my “to do” list for 2011.
Secrets to Finding Roadside Treasures
Here I shared the three reasons I have been so successful in finding roadside freebies.
Block Printed Pillows
Vintage printing blocks and letters were used to create unique patterns on fabric which were then turned into pillows.
One Dollar Decorating
I found a mismatched group of milk glass vases at the thrift store and created a pretty table and mantle for only one dollar.
My Sewing Machine
The only sewing machine I have ever owned belonged to my Grandmother - proving it does not take a fancy sewing machine to sew!
Worth the Wait
This post highlighted the landscaping transformation our house has gone through since moving in nine years ago. We began with nothing but dirt and have slowly created a yard we are proud to call our own.
So there you have it – the best of Red Door Home 2010. Hope you enjoyed the past year as much as I have. I am looking forward to 2011 and all the great projects and posts the year brings.
I would love to know your favorite post of 2010? What would you like to see more of in 2011?
Labels:
Block Printing,
Budget Ideas,
Dining Rooms,
Finds,
Furniture,
Home Decor,
How to,
Inspirations,
Landscaping,
Living Rooms,
Milk Glass,
Molding,
Outside,
Painting,
Pillows,
Sewing,
Tablescapes
Wednesday, December 29, 2010
WINTER FLOWERS
Just popping in with a quick post! Thought you might enjoy my winter flowers...
verbena in an old well bucket.
pansies are one of my favs.
sweet alyssum in old terra cotta pots.
pansies and more pansies.
love these pansies in this fab white pot.
what a surprise! more pansies in an old kettle.
luscious lobelia.
bacopa and what else? pansies.
pink pansies.
sweet alyssum on the front patio.
hope you enjoyed the winter flowers! back with a surprise (first of two) soon!
Happy New Year!!
Wednesday, December 22, 2010
Holiday Blessings from Our House to Yours
Wishing you, your family and the ones you love a blessed holiday season and merry Christmas. May your heart be filled with peace, love and happiness!
I am grateful and so very appreciative to everyone who has taken the time to read this blog and share their thoughts over the past year. Thank you! I will be back after the New Year with lots of new tutorials, ideas and projects.
Tuesday, December 21, 2010
CHRISTMAS MOMENTS***THE FINALE
For me Christmas isn't about over the top decor and big blow~up santas and snowmen on the lawn... Not that there's anything wrong with that.
It just isn't me.
Here are some final glimpses into our holiday home, be it ever so humble.
Meet Miss Merry Christmas.
Some favorite cards I gave and received along the mantle.
This year my charlie brown tree is strewn with old rosaries.
I will be back after Christmas with a surprise for all you that I think you will enjoy. Until then, may each of you be blessed with a happy, safe and very merry Christmas!
Shelley
Monday, December 20, 2010
Woolly Winter Wonderland!
Yes, we're nearly there - just a few more days!
Halfpenny Home has seen an awful lot of handcrafted presents planned and made during this last year. A handmade gift means so much more than a shop bought present as the recipient knows how much thought and care has gone into producing it. One of our Sew and Crow ladies, Michelle has really thrown herself into her crafting and presented me with this wonderful bauble wreath - I love it!
I on the other hand could not resist the temptation to knit up some of the Colinette Point Five that we have in the shop. This speedy one skein pattern is on the very wonderful Purlbee, the blog for Purl Soho in New York. It's really easy and comfy to wear, we need as many woolly knits as possible with all this snow!
Purlbee has some brilliant projects and I'm quite a fan! Jane Southgate and I have been looking for a long sock pattern for ages and couldn't quite find one that we liked until we saw one on the Purlbee blog. We had to get it and it arrived just before knitting...
It took me no time at all to start knitting up a pair in the hand dyed Wensleydale yarn from the Gedgrave Flock.
They are on hold for now though as along with everyone else I've got loads more presents to make and it's getting closer and closer to the big day!
Everyone needs to stop for lunch though and I can't knit and eat but I do like a read and luckily for me the current issue of Oh Comely magazine has just been dropped off.
Right lunch over, back to work! Halfpenny Home will be closed after Wednesday 22nd December and will re-open on Saturday 8th January 2011. Hope everyone's Christmas preperations are going smoothly, Nic x
Sunday, December 19, 2010
Gingerbread Houses
Baking and decorating gingerbread houses are two of my favorite holiday traditions. I don’t create anything elaborate or complex like the house pictured above. Rather, I use a kit purchased several years ago from Magic Cabin . . .
. . . which includes everything needed – recipes and cookie cutters – to make a simple ready-to-be-adorned house like the one shown below.
Here is a quick run through of the entire process.
To make the dough, melt 1 cup of white Crisco in a large pot over medium heat. Add 1 cup sugar and 1 cup of unsulfered molasses, stirring until sugar is completely melted.
In a separate bowl combine 5 cups flour, 1 tsp. salt, 1 tsp. baking soda, 1 tsp. nutmeg and 2 tsp. ginger. Remove pot from heat. Add 4 cups of the dry ingredients to molasses mixture. Stir with spoon until combined. Mix in last cup of dry ingredients with your hands.
Roll dough on a cookie sheet using a rolling pin or tall glass. Use the cookie cutters to make the appropriate number of pieces to construct the house.
Bake at 375 degrees for approximately 13 minutes or until light brown.
Cool completely. Don’t worry if your pieces are not perfect - icing can hide almost any imperfection
Assemble the house using the provided icing recipe or one of your own. I make an easy royal icing of 3 tablespoons meringue powder, 4 cups confectionary sugar and 6 tablespoons water.
For the foundation I use inexpensive cookie trays from the Dollar Store and a white paper doily. Apply icing to all edges of the gingerbread house.
Let the icing harden before decorating.
To attach the candy use store bought icing. Making your own icing is also an option.
Be creative and have fun! The only limitation is your imagination. (Above and below are pictures of the house I created this year.)
Notes: You may remember last year when I showcased gingerbread houses made by several of my friends. Sadly, this year time passed me by and I was not able to host my annual holiday gingerbread house decorating party. Hopefully next year I will get my act together sooner and revive this annual tradition. Also, the kit I use is no longer available through Magic Cabin but they do have several other options. Finally, I have never eaten the finished gingerbread, it smells delicious and several friends have said it does taste good. I concentrate all my nibbling on the candy!
I would love to hear about your experiences with gingerbread houses. Have you ever made a gingerbread house? Did you design your own or use a kit? What are your favorite candy decorations?
Subscribe to:
Posts (Atom)